Best homemade RV holding tank treatment is not something most RV owners think about until the smell hits. Managing an RV black tank is one of the most avoided topics in the RV community, whether you are navigating the desert in a van or living full-time in a motorhome.
Pancake-batter sludge, sensor failures, and the dreaded poop pyramid are common problems, and most commercial RV toilet treatments only mask them. Finding the best homemade RV holding tank treatment is the only reliable way to strip buildup, restore tank health, and eliminate odors at the source.
💡 Key Takeaways:
- The Philosophy: Successful tank management is about lubrication and surface tension, not digestion.
- Top Recipe: The Geo Method (Calgon + Laundry Detergent) is the #1 field-tested DIY solution for odors and sensor health.
- The Sensor Fix: Using Dawn dish soap in RV black tanks is the secret to stripping the greasy biofilm that causes false “Full” readings.
- Massive Savings: Homemade mixes average $0.35 per dump, saving full-timers over $200 annually.
- Safety First: DIY methods are RV septic tank treatment safe and free of harsh formaldehyde.
If you’re tired of “forest-scented sewer” smells and overpriced RV toilet chemicals, I’m going to share the exact DIY methods I use to keep my RV black water tank factory clean for pennies on the dollar. This isn’t just theory; this is field-tested, “in-the-trenches” advice from someone who has emptied more tanks than I care to count. Whether you are a weekend warrior or transitioning to full time RV living, understanding the chemistry of your black water tank RV will change your camping life.
Why Your RV Black Water Tank Smells (And Why Chemicals Fail)
The biggest objection I hear from new RVers is: “Isn’t it dangerous or illegal to use homemade chemicals in an RV holding tank treatment?” Here is the deal: It’s actually the opposite.
For decades, the RV industry relied on formaldehyde based RV tank treatment. While effective at killing smells, formaldehyde is a known carcinogen that wreaks havoc on RV septic tank treatment systems at campgrounds. It kills the “good” bacteria that septic systems need to function, leading to costly repairs for park owners. In fact, these chemicals are now banned in several states. When we switch to DIY methods, we aren’t just saving money; we are being better neighbors to the parks we love.
The Science of Slippery vs. Digested
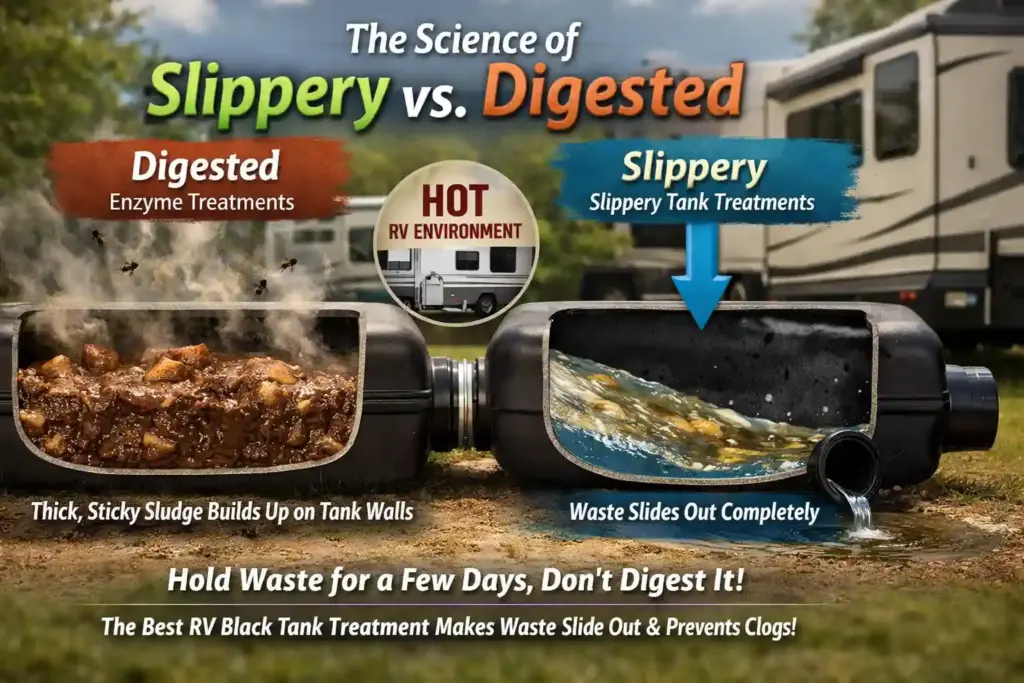
Your black water tank RV isn’t a septic tank; it’s a holding tank. You aren’t trying to grow a colony of waste-eating bacteria over several months. You are holding waste for a few days at most. Unlike research projects where genetically modified bacteria break down plastics in saltwater over time, your RV system is designed for short-term storage and controlled disposal.
Commercial enzymes try to “digest” waste into a liquid slurry. However, in the high heat of an RV bay, this creates a thick, stinking goop that sticks to the walls. The best RV black tank treatment doesn’t digest; it reduces surface tension. By making the tank walls slippery, waste slides out completely when you dump, preventing the buildup that leads to desperate searches for how to unclog RV black tank.
My Real World Test Using Homemade RV Holding Tank Treatments
I didn’t switch to homemade RV holding tank treatments to save money. I made the change because commercial products failed me during a three week summer stay in southern Arizona, where daytime temperatures regularly climbed above 100 degrees.
At the time, I was using a well known pod based RV black tank treatment that promised odor elimination and sensor protection. Within five days, the bathroom developed a strong sulfur smell even with the roof vent open. Worse, the black tank sensors stayed stuck on full after dumping. I initially assumed it was a faulty monitor panel until the same issue repeated itself two days later.
While staying at a small RV park outside Tucson, I spoke with a long term host who had been full timing for more than ten years. He asked me a simple question that changed how I thought about black tank care. Was I trying to digest waste or remove it?
Why Commercial RV Tank Treatments Failed in Extreme Heat
He explained that in extreme heat, enzyme based treatments often thicken waste instead of breaking it down. When tanks sit for several days between dumps, those enzymes can turn liquid waste into sludge that sticks to the tank walls. That buildup is what causes lingering odors and false sensor readings.
That same evening, I flushed the tank thoroughly and switched to the Geo Method for the remainder of the trip. After the first drive and dump cycle, the tank drained faster and cleaner than it had in weeks. After three dump cycles, the sensors began reading accurately again. Most importantly, the odor disappeared completely, even during the hottest part of the day when smells usually worsen.
I repeated this process months later during a long stay in Florida, where humidity accelerates bacterial growth. That is when I added the Pine Sol and Calgon mix. Once again, the results were consistent. There was no sulfur smell, the dump valve stayed smooth, and the toilet seal remained clean.
Since then, I have used these same homemade RV black tank treatments across different states, climates, and campground setups. The outcome has been repeatable every time. No recurring odors, no sensor issues, and no visible residue when rinsing the tank.
This is the system that has kept my rig odor free through extreme heat, long stays, and real world use. That consistency is why I trust these methods more than any commercial RV tank treatment I have tried.
Best Homemade RV Holding Tank Treatment: The Geo Method Explained
If you ask any veteran RVer on the iRV2 or Jayco Owners forums for the best black tank treatment, they will point you to the Geo Method. I was skeptical at first, but after one cross-country trip using it, I’ll never go back. This isn’t just a recipe; it’s a mechanical philosophy of RV black tank cleaning.
The Theory Behind the Method
The Geo Method uses a water softener (Calgon) to break the surface tension of the water. In most areas, hard water contains minerals that allow waste to hook onto the porous plastic walls of your RV tank. Calgon makes the water “wetter,” ensuring that nothing, not even toilet paper, can gain a foothold.
The Geo Method Recipe (For a 40-Gallon Tank)
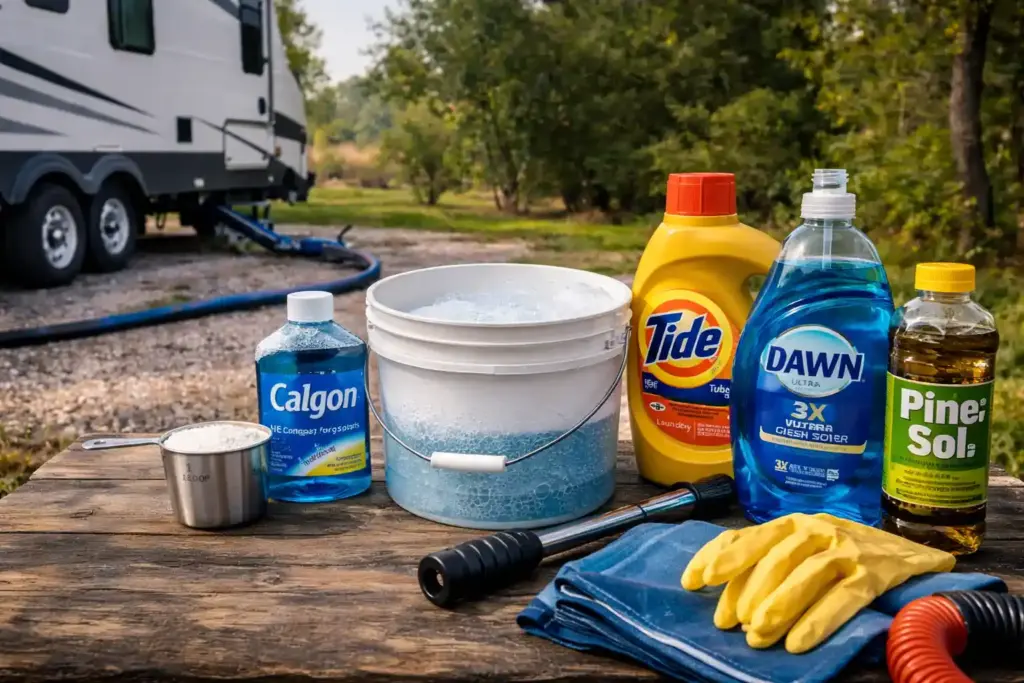
- 1 Cup Water Softener: Calgon (Liquid or Powder) is the gold standard for an RV tank cleaner.
- 1 Cup Laundry Detergent: Any high-efficiency detergent works. This acts as the primary RV black tank cleaner, breaking down grease and solids.
- 2-5 Gallons of Water: Never, ever add chemicals to a bone-dry tank.
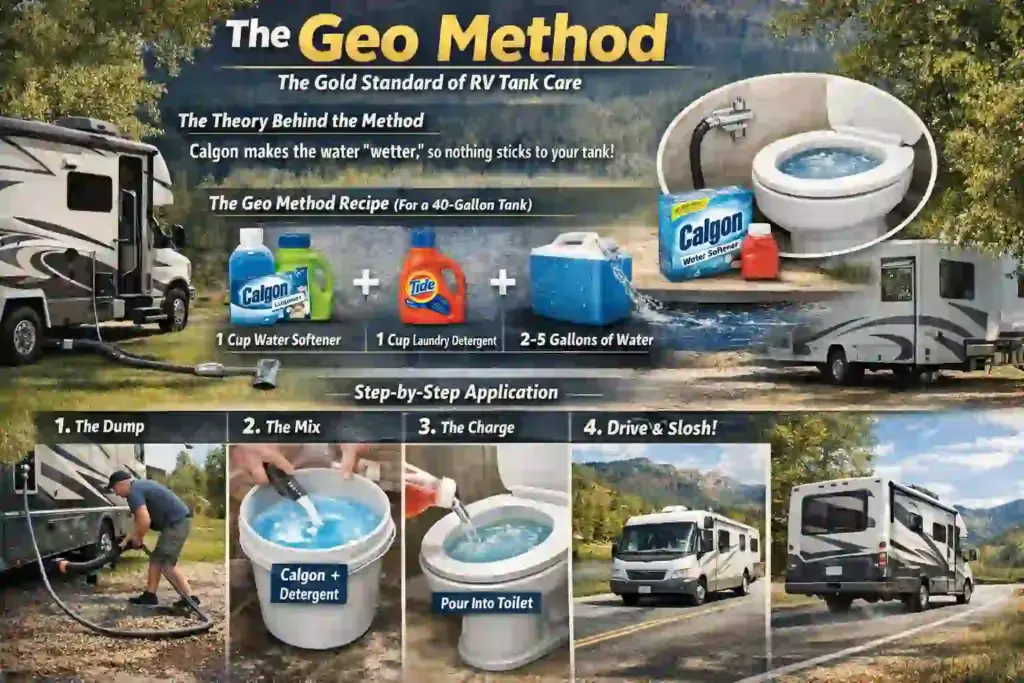
Step-by-Step Application
- The Dump: Empty your RV black water tank and use an RV black water tank cleaning wand if you have one.
- The Mix: Dissolve the Calgon and detergent in a bucket of hot water. Don’t just pour the powder in; it can clump at the bottom.
- The Charge: Pour the mix down the toilet and add your charge water.
- The Agitation: This is the most important step. Drive the RV! The sloshing action while you drive is what provides the mechanical scrubbing that best RV toilet treatment liquids alone cannot match.
The Pine-Sol & Calgon Mix: Elite Odor Control
When temperatures rise above 90 degrees, you need a heavy-duty RV tank deodorizer. I picked up this recipe from professional tank cleaners like Kleen Tank, and it has saved me during humid summers in the Deep South.
Why Pine Oil?
Original Pine-Sol is a natural disinfectant. It kills the mold and anaerobic bacteria that produce methane and sulfur smells. It is an incredible RV septic tank cleaner that is biodegradable and safe for the rubber valves in your black tank RV. Unlike bleach, which can dry out and crack your seals, pine oil actually provides a level of lubrication.
The Concentrate Recipe
- 40 oz Original Pine-Sol
- 8 oz Liquid Calgon
- Water (to fill a 1-gallon jug)
Dosage: Use 1/2 cup of this holding tank treatment per dump. It leaves the bathroom smelling fresh without that “chemical” tang. It’s the most cost-effective RV black tank deodorizer I’ve ever found.
The Magic of Dawn Dish Soap in RV Black Tanks
One of the most effective tools in your RV black tank cleaning arsenal is sitting under your kitchen sink. Using dawn dish soap in RV black tanks is the secret weapon used by professionals to fix zombie sensors.
Now that you know the recipes, watch me demonstrate exactly how to mix them and the best way to drive your rig to ensure those sensors get scrubbed clean!
The Grease-Cutting Factor
Why do sensors fail? Your black water tank RV contains body oils, fats from food, and soap scum. These create a biofilm, a greasy layer that coats the sensor probes inside the tank. This layer can hold moisture, creating an electrical bridge that makes the sensor read “Full” even when the tank is empty.
Dawn Ultra is specifically engineered to break down these exact fats and oils. It is much more effective than standard RV tank cleaner products at stripping away this biofilm.
The Deep Soak Sensor Reset Procedure
If your sensors are giving you trouble, follow this protocol:
- Fill your RV black water tank to 90% with fresh water.
- Add 20 oz of Blue Dawn Ultra.
- Let it sit for 24 hours while you are parked at a site.
- Drive 20-50 miles. The suds will rise to the top and scrub the sensor probes.
- Dump. You will likely see black stuff in toilet tank drainage, this is the old residue and mold that Dawn has successfully loosened.
🎥 RV Tank Cleaning Hack: Dawn Dish Soap Travel Day Trick
The video follows the hosts as they tackle the common problem of greasy buildup and “zombie sensors” that read full even when empty. Before a travel day, they pour about 20 ounces of Dawn Ultra down the drains and fill the tanks partially with water. The core “hack” is the travel day agitation: as they drive to their next destination, the sloshing action creates a powerful sudsy scrub that strips away grease, soap scum, and food particles from the tank walls and sensor probes. By the end of the trip, they show the results of the dump and check their monitor panel to see if the sensor accuracy has improved.
How to Unclog RV Black Tank (The “Poop Pyramid” Fix)
It happens to the best of us. You leave the black tank valve open while hooked up to city sewer, the liquids run out, and the solids pile up into a poop pyramid directly under the toilet pipe. If you are wondering how to clean black tank on RV when it’s completely blocked, don’t panic.
The Heat and Soap Rescue Mission
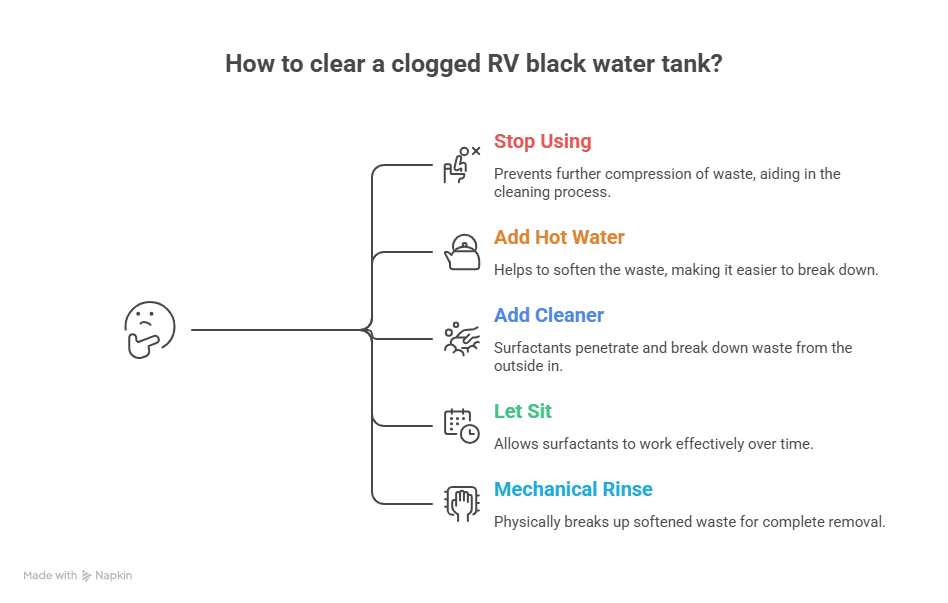
- Stop Using the Toilet: Adding more waste will only compress the mass.
- The Heat Wave: Pour 5 gallons of hot water into the tank.
- The Surfactant Boost: Add a double dose of your homemade RV black water tank cleaner (2 cups Calgon, 2 cups Dawn).
- The Time Factor: Let it sit for 48 hours. The surfactants will slowly penetrate the hardened waste from the outside in.
- The Mechanical Rinse: Use a black tank cleaner for RV to physically break up the softened mass.
Debunking Maintenance Myths: Fabric Softener and Ice Cubes
In the RV world, myths spread faster than a campfire rumor. Let’s look at two of the most common ones.
Fabric Softener in Toilet Tank
Many RVers suggest using fabric softener in toilet tank (1/2 cup) to keep seals lubricated and the tank smelling fresh.
While it does help with smell, it doesn’t clean. In fact, many fabric softeners contain animal fats that can actually contribute to sensor biofilm if you use too much. It’s a decent holding tank deodorizer in a pinch, but Calgon is much better for the long-term health of your tank.
The Ice Cube Myth
The legend says dumping two bags of ice down the toilet before a drive will scrub the tank walls like a rock tumbler.
Testing by professionals shows that ice melts far too quickly in a warm RV tank. Furthermore, ice floats. It isn’t scrubbing the bottom or the sides where the sludge lives; it’s just chilling your waste. Save your ice for your drinks and use the tank clean agitation of the Geo Method instead.
Deep Cleaning vs. Daily Treatments
There is a major difference between a maintenance treatment and a deep cleaner. Maintenance treatments like the Geo Method or Pine-Sol should be used after every single dump. They keep the environment hostile to odors and keep the walls slippery.
Deep cleaners like liquified RV toilet treatment alternatives or specialized hydro-jetting should be done:
- Every 3 months for full-timers.
- Once a year before winterizing for weekenders.
- Anytime your sensors start acting up.
Troubleshooting Common Issues
Black Stuff in Toilet Tank
If you see black stuff in toilet tank or around the seal, it’s usually mold or mineral buildup. Switch to a pine-oil based RV black water tank cleaner and use a soft brush to clean the rim. Do not use bleach, as it can damage the rubber.
Best Additive to Remove Water from Gas Tank vs. Black Tank
I’ve seen some confusing advice lately. Some people ask for the best additive to remove water from gas tank in the same breath as tank treatments. While both involve treatments, they are entirely different! For your fuel tank, you want an alcohol-based emulsifier. For your RV black tank, you want the surfactants we’ve discussed. Using a fuel additive in your toilet could melt your plumbing!
Maintaining the Seal
To prevent your toilet from losing its water seal, apply a small amount of coconut oil or a dedicated silicone lubricant to the rubber flapper once a month. This keeps it supple and prevents the need for expensive repairs.
DIY vs. Commercial Treatments: A Data Comparison
| Feature | Geo Method (DIY) | Pine-Sol Mix (DIY) | Commercial Pods |
| Cost Per Dump | ~$0.30 | ~$0.45 | ~$2.00 – $3.50 |
| Sensor Safety | Superior | Excellent | Poor |
| Eco-Friendliness | RV Septic Safe | RV Septic Safe | Variable |
| Primary Goal | Lubrication | Disinfecting | Masking |
FAQs
1. Is this truly the best homemade RV holding tank treatment?
In my experience, yes. The Geo Method is widely considered the best homemade RV holding tank treatment because it addresses the mechanical cause of smells.
2. Can I use vinegar and baking soda?
While great for household drains, the volume of an RV black water tank is too large for the fizzing action to do much. Additionally, vinegar is an acid that can dry out your rubber seals over long periods.
3. Is it safe to use a household black tank cleaner for RV use?
Never use caustic drain cleaners like Drano. They generate intense heat that can melt your black water tank RV pipes.
4. How often should I perform an RV black water tank cleaning?
You should treat your tank after every single dump. A deep cleaning RV black tank session with dawn dish soap in RV black tanks should be done every 3 months.
The Golden Rule: Water is Your Best Friend
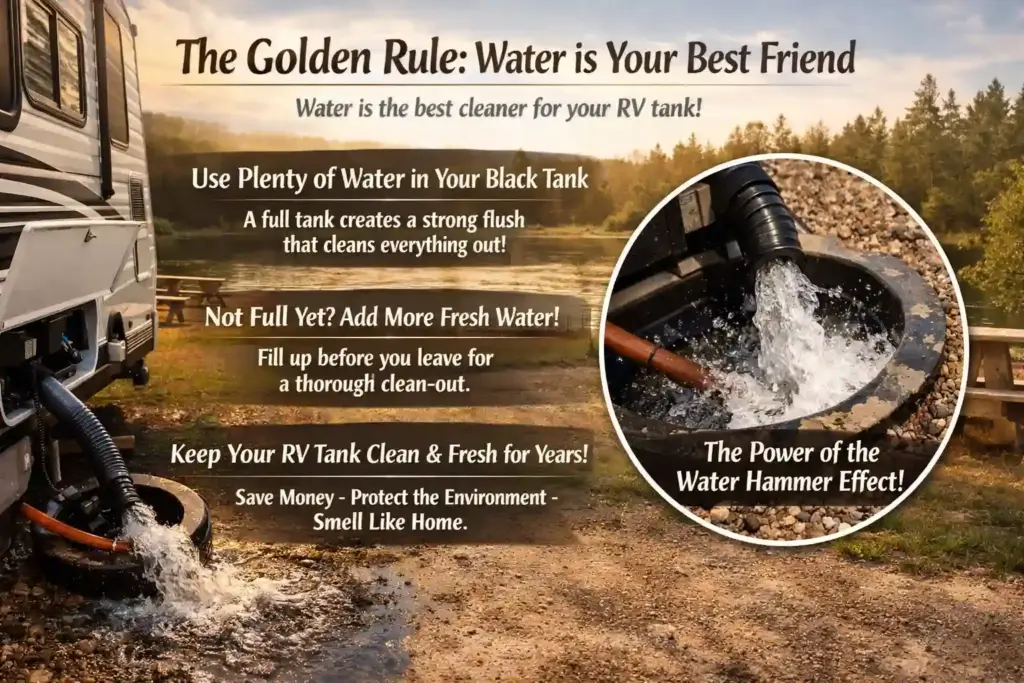
No matter how many RV toilet chemicals or RV tank deodorizer recipes you use, remember this: Water is the best cleaner. The biggest mistake I see is people trying to conserve water in their black tank.
You want the “water hammer” effect. When you open that valve, you want a massive weight of liquid to come rushing out. This creates a vacuum effect that pulls all the solids out through your RV sewer hose in one clean, powerful motion, making cleanup easier before placing everything back into your RV Sewer Hose Storage compartment.
If you aren’t full when it’s time to leave the park, add more fresh water until you are. It’s the difference between a tank that stays clean for decades and one that becomes a permanent headache. Managing your RV black tank doesn’t have to be a nightmare. By switching to a homemade RV black water tank cleaner, you’ll save money, protect the environment, and keep your rig smelling like home.